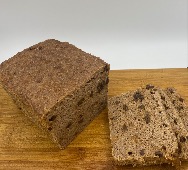
This sprouted whole grain bread is completely flour free and similar to commercially made manna bread. It’s very dense and the sprouted grains give it a natural sweet chewy texture. It’s not difficult to make, but it requires planning. First there is sprouting and fermenting the grains. While adding flavor, the fermented grains produce natural leavening similiar to sourdough. This hearty bread is baked in a Dutch oven to create a beautiful moist loaf. Every time I make this bread, it gives me comfort to know what I’m eating is packed with optimal nutrition. I also have the bonus and benefit of enjoying several days of drinking an enhancing probiotic beverage which was derived from the fermented grains.
Yield: one loaf (about 36 oz)
Ingredients
- 1 cup wheat berries, to be sprouted
- 1 cup rye berries, to be sprouted
- 1 cup buckwheat groats, soak day before rejuvelac ready
Step One – Sprouting (allow 1-2 days)
- Soak and sprout the wheat and rye berries separately. If you’re not familiar with sprouting, fermenting check out this link for more details.
Step Two – Ferment Grains (allow 2-3 days)
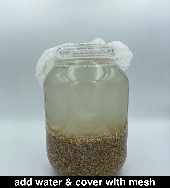
- Combine the sprouted wheat/rye berries with 12 cups water and ferment them. (The fermented grains will become a leavening agent and becomes a probiotic beverge called rejuvelac. The rejuvelac is ready when it develops a a slightly sour smell. It will also turn cloudy with visible bubbles forming on top).
- The day/night before the rejuvelac is ready, soak the buckwheat (minimum 6 hours but can soak as long as overnight)

Step Three – Grinding the Grains
- Strain the buckwheat. The soaking water will be mucilaginous (slimy). Rinse the buckwheat then leave it in the strainer until well drained. (8-10 minutes)
- While saving the rejuvelac, strain the rye/wheat berries. Do not rinse these but drain well.
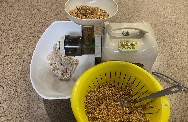
- Combine all three grains then using a food processor, meat grinder or a masticating juicer to grind the grains. (I use a Samson Juicer with the mincing blade). The grains will become a very heavy sticky mass of dough. (Cleaning tip. Do not allow dough to dry on the utensils or equipment. Immediately put these in water until you have time to wash).
Step 4 – Optional Additions
- 1 ½ tsp (11 g) non iodized salt
- ¾ cup (4 oz) raisins
- 1 ¼ tsp cinnamon
- ¾ tsp nutmeg
- 1 ½ Tbsp caraway seeds
- It’s easiest to mix the salt and spices with the grains before processing. If using raisins, leave them whole and add them after.
Step 5 – Bulk Fermentation (allow 12-32 hours)
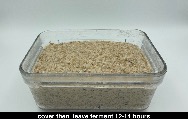
- Transfer batter to a Pyrex (glass) loaf pan. Use parchment paper or grease bottom and sides of pan. Using oil is not as effective as a fat like coconut oil. Choose a pan large enough for the dough to rise a few inches.
- Cover and leave ferment. (Small air bubbles will form in the dough and it will rise slightly. Fermenting also adds to the flavor. The longer the fermenting, the more sourdough flavor is enhanced. A warm environment results in faster fermenting/rising. For consistency of a warm environment, place in oven with light on).
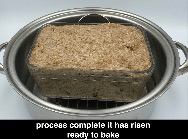
Step 6 – Bake in Dutch Oven/Roaster
- Start baking from cold oven.
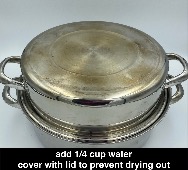
- Place a wire rack on the bottom of the Dutch oven then add about 1/4 cup of water. Center loaf pan on wire rack. Place lid on Dutch oven then put in on the bottom rack of a cold oven. Set temperature to 375°F and leave for 45 minutes then turn oven temperature down to 350°F. Continue baking for another 40 minutes. Bread is done when internal temperature is between 190-205°F.
- Remove the bread from the oven, being very careful when lifting the lid. Allow bread to cool for at least one hour before removing from pan. Once completely cooled, slice bread. (To prevent bread from sticking to knife, use a serrated knife and wipe blade down with a wet cloth in between slices).
- Keep well wrapped bread in fridge and use within one week or freeze for longer storage. (Tip: To keep bread slices from sticking together put a small piece of parchment paper or use hamburger patty papers in between the slices).
- This bread is also wonderful toasted with a spread of nut butter or tahini and topped with sliced banana.